Detecting attached monitors on MacOS

If you boot MacOS with a KVM attached and a second monitor is not actually attached at boot time, on my 2008 Mac Pro at least, the second monitor is not automatically detected (it works fine if the KVM is already switched to the Mac at boot).

To force MacOS to detect additional monitors, hold the Option key in System Preferences / Displays, and then click on the ‘Detect Monitors’ button that appears.

See article here.

WLS 12c 12.1.3 on MacOS – error: CFGFWK-42057: No templates installed

The WLC 12c 12.1.3 config.sh fails to find installed domain templates after a new/clean install and attempting to create a new domain, it gives an error:

CFGFWK-42057: No templates installed

This doesn’t seem to be a common issue, but luckily this post mentions the domain templates are installed to wlserver/common/templates/wls

Selecting the ‘Create Domain using Custom Template’ option and pointing to this location, sure enough the templates are there. Selecting the wls.jar template, and continuing, I then get this:

Ugh. I’ll install on Linux instead.

Switching Java versions on Mac OS

The Java JDK install on MacOS has some interesting platform specific utilities, like

/usr/libexec/java_home

which tells you which Java version you’re currently using and where it’s installed. I have Java 9 currently installed and it tells me:

/Library/Java/JavaVirtualMachines/jdk-9.jdk/Contents/Home

If you have multiple version installed, adding -V will list all the versions and where they’re installed:

$ /usr/libexec/java_home -V
Matching Java Virtual Machines (2):
    9, x86_64: "Java SE 9" /Library/Java/JavaVirtualMachines/jdk-9.jdk/Contents/Home
    1.8.0_101, x86_64: "Java SE 8" /Library/Java/JavaVirtualMachines/jdk1.8.0_101.jdk/Contents/Home

The next logical question from here would be ‘how do I switch versions’? If you set your $PATH in a .profile or similar approach, you can eval java_home to add the current version to your path, but a neat trick discussed in one of the answers here (thanks to this SO user for this tip) uses the -v option to allow you to switch versions. Adding a couple of aliases to your .profile like this:

alias j9="export JAVA_HOME=`/usr/libexec/java_home -v 9`; java -version"
alias j8="export JAVA_HOME=`/usr/libexec/java_home -v 1.8`; java -version"
alias j7="export JAVA_HOME=`/usr/libexec/java_home -v 1.7`; java -version"

… and you’ve got a quick shortcut to switching between different versions.

Proxmox installation on a 2008 Mac Pro

Following on from my earlier article, I read some more about Proxmox running on a Mac Pro so decided to give it a go.

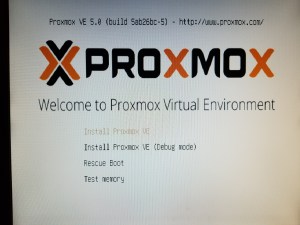
I added an empty drive into one of the spare bays, and then booted from the Proxmox installer.


After first boot and logon with the default root user to the web interface:

The first VM I want to create is for CentOS, and I have the iso ready to go on an attached usb drive, which I copied to the isos dir on Proxmox (/var/lib/vz/template/iso – defined storage locations for images are covered in answers to this post). The image now shows up on the local storage:

Creating a new VM based on this image:

Starting up the image and starting the CentOS install using the web-based vnc access:

… after completing the install, success!