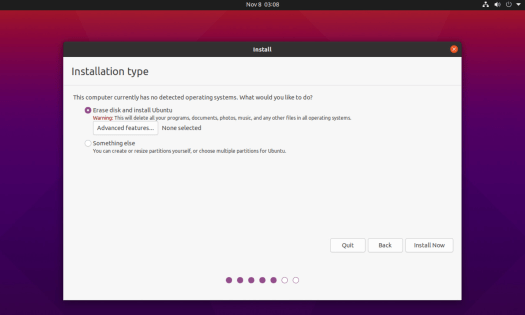
Installing to a new VM from .iso, with a 2 vCPU, 2GB RAM VM.
Booting up from iso:


Success!


Articles, notes and random thoughts on Software Development and Technology
Installing to a new VM from .iso, with a 2 vCPU, 2GB RAM VM.
Booting up from iso:


Success!

I had to renew my SSL certs for this site, so while doing so I upgraded and addressed a few other issues.
First, apparently when I deployed the SSL certs last time I missed out some of the root certs in the chain. The vendor I used gives you each of the root certs individually and you need to manually concatenate them together yourself. More in another post on the steps I too to do this.
Since certs are part of my nginx Docker image, I rebuilt my image upgrading everything to latest versions. Since it was a also a couple of years since I last did this, I also had to go back through my posts here to work out the steps I took to deploy last time. I’ll post another update on the steps I took for this also later.
Moving an nginx install from Ubuntu 14.04 to 18.04 and upgrading to more recent versions of nginx, php, php-fpm, I ran into this error in my nginx config:
2020/02/28 04:45:47 [crit] 11784#11784: *1 connect() to unix:/var/run/php7.2-fpm.sock failed (2: No such file or directory) while connecting to upstream, client: 192.168.x.x, server: , request: "GET /index.php HTTP/1.1", upstream: "fastcgi://unix:/var/run/php7.2-fpm.sock:", host: "10.x.x.x"
The “No such file or directory” error is talking about the nginx connection to the php7.2-fpm.sock, rather than the file the GET request is for.
On closer look at where the .sock file is located, this was a subtle error to find and fix, but the fix was simple as I was pointing to the wrong path.
In my nginx default config, I had this line (migrating from a config for an older nginx and pphp-fpm version, this is where it was before):
fastcgi_pass unix:/var/run/php7.2-fpm.sock;
… I was missing a /php/ dir in the path, so changing to the correct path was the fix:
fastcgi_pass unix:/var/run/php/php7.2-fpm.sock;
Turns out if you have an older base image downloaded locally and you try to rebuild your own image based on it a couple of years later, you could get errors running apt-get in your own Dockerfiles. I just got errors like this rebuilding an image that I first created 2 years ago:
Err http://archive.ubuntu.com/ubuntu/ trusty-updates/main libcurl3 amd64 7.35.0-1ubuntu2.14
404  Not Found [IP: 91.189.88.149 80]
Get:16 http://archive.ubuntu.com/ubuntu/ trusty-updates/main ca-certificates all 20170717~14.04.1 [167 kB]
Err http://archive.ubuntu.com/ubuntu/ trusty-updates/main krb5-locales all 1.12+dfsg-2ubuntu5.3
  404  Not Found [IP: 91.189.88.149 80]
Get:17 http://archive.ubuntu.com/ubuntu/ trusty/main libsasl2-modules amd64 2.1.25.dfsg1-17build1 [64.3 kB]
Err http://security.ubuntu.com/ubuntu/ trusty-security/main libcurl3 amd64 7.35.0-1ubuntu2.14
  404  Not Found [IP: 91.189.88.31 80]
Err http://security.ubuntu.com/ubuntu/ trusty-security/main openssl amd64 1.0.1f-1ubuntu2.23
  404  Not Found [IP: 91.189.88.31 80]
Err http://security.ubuntu.com/ubuntu/ trusty-security/main curl amd64 7.35.0-1ubuntu2.14
  404  Not Found [IP: 91.189.88.31 80]
Fetched 1375 kB in 7s (175 kB/s)
E: Failed to fetch http://archive.ubuntu.com/ubuntu/pool/main/k/krb5/libkrb5support0_1.12+dfsg-2ubuntu5.3_amd64.deb  404  Not Found [IP: 91.189.88.149 80]
If you delete the base ubuntu image you have cached locally, and try again, you’ll pull down a latest image, and now your build should continue as expected.