AWS provides a VM image that can be run locally to provide a local NFS mount that transparently transfers files copied to the mount to an S3 bucket.
To setup, start by creating a Storage Gateway from the AWS Management Console:

Select ‘VMware ESXi’ host platform:

Unzip the downloaded .zip file.
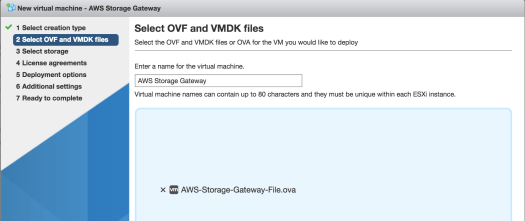
From your ESXi console, create a new VM and select the ‘Deploy VM from OVF / OVA file’ option:

Click the ‘select file’ area and point to the unzipped .ova file on your local machine:
Per Storage Gateway instructions, select Thick provisioned disk:

Press Finish on next Summary screen, and wait for VM to be created.
Back in your AWS Management Console, Next through remaining setup pages, enter IP of your Storage Gateway. The instructions say the VM does not need to be accessible from the internet, and instructions here walk you logging on to the VM with the default credentials to get your IP assuming it’s not already displayed on your ESXi console for the running VM):

Powering on the VM, I get a logon prompt:
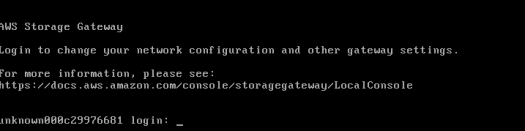
After logging on with the default credentials, the next screen gives me the assigned IP:

Entering the IP in the Management Console, setting timezone to match my local timezone, and then press Activate to continue:

At this point, AWS is telling me I didn’t create any local disks attached to my VM, which is true, I missed that step:

According to the docs you need to attach 1 disk for an upload buffer, and 1 for cache storage (files pending upload). Powering down my VM, I created 2 new disks, 2GB each (since this is just for testing):
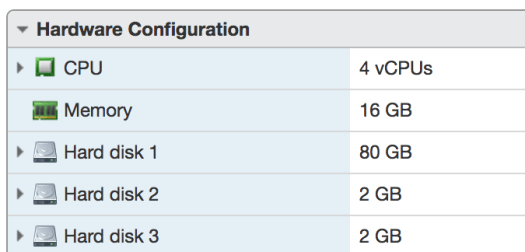
Pressing the refresh icon, the disks are now detected (interesting that AWS is able to communicate with my VM?), and it tells me the cache disk needs to be at least 150GB:

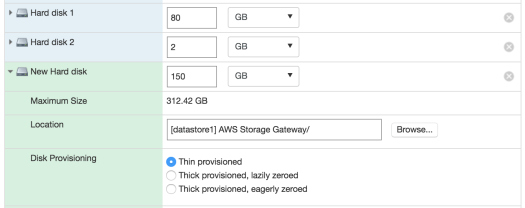
Powering down the VM again and increasing one of the disks to 150GB, but thinly provisioned (not sure I have too much spare disk on my server for 150GB thickly provisioned):
Powering back on, pressing refresh in the AWS Console:

Ok, maybe it needs to be thick after all. Powering off and provisioning as thick:

I allocated the 150GB drive as the Cache, and left the other drive unallocated for now. Next to allocate a share:

At this point you need to configure the file share to point to an existing S3 bucket, so make sure you have one created at this point, if not open another Console and create one then enter it here:


By default, any client that’s able to mount my share on my VM locally is allowed to upload to this bucket. This can be configured by pressing edit. I’ll leave as the default for now. Press the Create File Share button to complete, and we’re done!
Next following the instructions here, let’s mount the Storage Gateway file share and test uploading a file:
For Linux:
sudo mount -t nfs -o nolock [Your gateway VM IP address]:/[S3 bucket name] [mount path on your client]
For MacOS:
sudo mount_nfs -o vers=3,nolock -v [Your gateway VM IP address]:/[S3 bucket name] [mount path on your client]:
Note: from the AWS docs there’s a missing space between the nfs drive and the mount point in both of these examples, and the Linux example has a trailing ‘:’ which is also not needed.
For Ubuntu, if you haven’t installed nfs-common, you’ll need to do that first with
sudo apt-get install install nfs-common
… otherwise you’ll get this error when attempting to mount:
mount: wrong fs type, bad option, bad superblock on ...

For Ubuntu, here’s my working mount statement (after installing nfs-common):
sudo mount -t nfs -o nolock vm-ip-address:/s3bucket-name /media/s3gw
… where /media/s3gw is my mount point (created earlier).
To test, I create a file, copied to the mount dir, and then took a look at my bucket contents via the Console:

My file is already there, everything is working!


