UTM frontend for QEMU for M1 Apple Silicon: Installing Windows 95

QEMU is an emulator for a wide range of machine architectures. I’ve played with QEMU on MacOS before to install and run Solaris on SPARC. It turns out there a QEMU build for Apple silicon M1, and there’s also a gui frontend to help with the configuration of various machines, called UTM.

Is there any CPU architecture that QEMU does not emulate? This is pretty amazing:

Let’s take a go at emulating an x86 32bit and install Windows 95. I added 3 drives, floppy (to boot from install disk image), a CD-ROM (for the install ISO) and a 4GB drive to install to:

Here’s where you add the disk images, and a summary of the other settings:

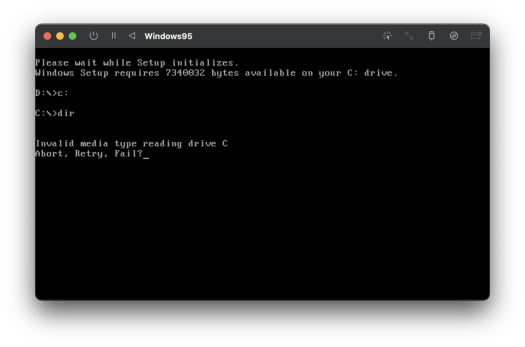
On first boot I got this error:

Doing some searching online it’s not immediately obvious if this is a configuration issue or a bug in UTM. One of the comments here does mention that the hdd disk image needs to be first (even though the dialog says the listed order is the boot order). I added the disks in this order and this seems to work:

While in the settings I also notice if you check the ‘advanced’ checkbox there’s options to turn of UEFI boot as that wouldn’t have been on PCs of this era, and changed the CPU to a 486:

Adding a blank 4GB disk image, a Windows 95 boot floppy image, the iso image for install cdrom, and then starting up, we can boot to a DOS prompt and start fdisk to format the blank disk image:

This works for the first time, but after you’ve formatted the blank disk image, booting a subsequent time fails with a ‘no operating system’ error. To get around this (because it won’t start unless the hd image is first), press Escape as soon as you get the BIOS screen and then you can select the boot device. In this case pick the floppy drive.

And now we’re away:

Select 1 for the NEC cdrom driver. At this point the cd iso should be on d: and c: should be your hdd disk image. If you try and run d:\setup.exe you’ll be reminded that fdisk doesn’t format your disk, you you need to format c: as well before you can install, otherwise you’ll see:

Rerun d:\setup.exe after format completes and now scandisk starts up:

Windows 95 setup is running – yes you can install x86 based OSes under UTM/QEMU on Apple Silicon!

Remember Active Desktop?

Installing SunPCI 1.3 software on Solaris 10: x86 PC single board computer in a SPARC machine

The SunPCI single board computer is an interesting piece of hardware. This was a self-contained x86 PC on a single card that could be installed in Sun Ultra machines, that along with supporting software allowed you to install any operating system that required x86 hardware and run it on your Sun SPARC machine alongside whatever you were natively running on SPARC, such as Solaris.

Rather than x86 emulation, this approach provided a real x86 CPU and everything you’d expect in a typical PC compatible machine, all on a single card.

I recently picked up a Sun Ultra 60 and was lucky that it came with a SunPCI card. After I did a fresh Solaris 10 install, I needed to find the SunPCI software and drivers which didn’t come with Solaris 10. I Googled for a while and found a link to an FTP site that had the SunPCI software… trouble is this was a couple of months ago, and I’ve since gone back to try and find the same site to include a link but I think the site has recently gone down…

The official product manuals are still available and can be downloaded from Oracle here:

https://docs.oracle.com/cd/F24621_01/index.html

Getting started with the install steps, I cd’d into the folder after I’d untar’d it, and then ran pkgadd -d to start the install:

After the install completed I got this error that the SunPCI driver was not installed:

cd into /opt/SUNWspci and run ./sunpci – this tells you to run sunpcload to load the drivers:

This error about not finding the .2100 driver files is mentioned in a few posts, and most suggest (like here) to just symlink the missing filename to the same corresponding named .280 files like this:

Now it starts up and prompts to create a new C: disk image:

Create a disk large enough for whatever you’re going to install:

Booting up the card, you can see the hardware specs from the BIOS screens as it boots up – this is a v1 (I think) SunPCI board with and AMD K6 at 300MHz:

The mounted cd-rom drive appears in the SunPCI machine as drive R:, so cd’ing into the root of the Windows 95 cd install cdrom here, and run setup.exe to start the install:

Windows 95 starts running!

After Windows 95 install, install the SunPCI drivers for Windows 95, these are to support the onboard video, etc on the SunPCI card :

At this point I have Windows 95 running on my SunPCI card! Apparently you can either run with a monitor connected directly to the VGA output on the board, or run within Solaris in a window sharing the same display. I haven’t tried the dedicated monitor option yet, I’ll look into this next!