In a minimal CentOS 7 install, there’s no ifconfig to check your network settings. Instead use
ip addr
More info here.

Articles, notes and random thoughts on Software Development and Technology
In a minimal CentOS 7 install, there’s no ifconfig to check your network settings. Instead use
ip addr
More info here.
Following the instructions to install the Openshift Origin binary from here, on first attempt to start it up I got this error:
failed to run Kubelet: failed to create kubelet:
misconfiguration: kubelet cgroup driver: "systemd" is different from docker cgroup driver: "cgroupfs"
Per instructions in this issue ticket, to verify which cgroup drivers docker is using I used:
$ sudo docker info |grep -i cgroup

Cgroup Driver: cgroupfs
Unfortunately the steps to check the cgroup driver for kubernetes don’t match with my install because I’m guessing the single binary Openshift Origin has it packaged all in one, so there is no corresponding systemd config for it.
This article suggested to configure the cgroups driver for Docker so it matches kubernetes, but it looks like the yum install for docker-ce doesn’t configure systemd for it either.
Ok, to the docs. Per the Docker docs for configuring systemd here, it suggests to pull to preconfigured files from a git repo and place them in /etc/systemd/system
Now I have the systemd files for Docker in place, this articles says to add this arg to the end of the ExecStart line in docker.service:
--exec-opt native.cgroupdriver=systemdNow reload my config and restart the docker service:
sudo systemctl daemon-reload
sudo systemctl restart docker
and let’s check again what cgroups driver we’re using with:
$ sudo docker info |grep -i cgroup

Cgroup Driver: systemd
… and now we’ve switched to systemd.
Ok, starting up Openshift again, this issue is resolved, there’s a lot of log output as the server starts up. After opening up the firewall ports for 8443, my Openshift Console is now up!
ExFat file systems are not supported out of the box on Debian, but support is provided by installing the exfat-utils package:
# apt-get install exfat-utils

Reading package lists... Done

Building dependency tree

Reading state information... Done

The following additional packages will be installed:

  exfat-fuse

The following NEW packages will be installed:

  exfat-fuse exfat-utils

0 upgraded, 2 newly installed, 0 to remove and 28 not upgraded.

Need to get 73.0 kB of archives.

After this operation, 295 kB of additional disk space will be used.

Do you want to continue? [Y/n] y
fdisk -l shows my usb disk as:
Disk /dev/sdc: 186.3 GiB, 200049647616 bytes, 390721968 sectors

Units: sectors of 1 * 512 = 512 bytes

Sector size (logical/physical): 512 bytes / 512 bytes

I/O size (minimum/optimal): 512 bytes / 512 bytes

Disklabel type: gpt

Disk identifier: ...

Device      Start       End   Sectors   Size Type

/dev/sdc1      40    409639    409600   200M EFI System

/dev/sdc2  411648 390721535 390309888 186.1G Microsoft basic data
So to mount sdc2:
mkdir /media/usbdisk (or whatever mountpoint you prefer)

mount -t exfat /dev/sdc2 /media/usbdisk
Done!
Following on from my earlier article, I read some more about Proxmox running on a Mac Pro so decided to give it a go.
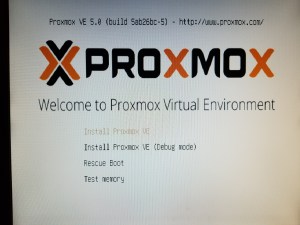
I added an empty drive into one of the spare bays, and then booted from the Proxmox installer.


After first boot and logon with the default root user to the web interface:

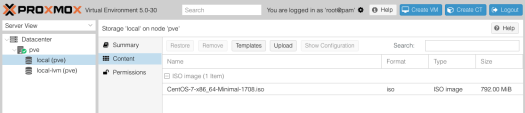
The first VM I want to create is for CentOS, and I have the iso ready to go on an attached usb drive, which I copied to the isos dir on Proxmox (/var/lib/vz/template/iso – defined storage locations for images are covered in answers to this post). The image now shows up on the local storage:
Creating a new VM based on this image:

Starting up the image and starting the CentOS install using the web-based vnc access:

… after completing the install, success!
