Proxmox installation on a 2008 Mac Pro

Following on from my earlier article, I read some more about Proxmox running on a Mac Pro so decided to give it a go.

I added an empty drive into one of the spare bays, and then booted from the Proxmox installer.


After first boot and logon with the default root user to the web interface:

The first VM I want to create is for CentOS, and I have the iso ready to go on an attached usb drive, which I copied to the isos dir on Proxmox (/var/lib/vz/template/iso – defined storage locations for images are covered in answers to this post). The image now shows up on the local storage:

Creating a new VM based on this image:

Starting up the image and starting the CentOS install using the web-based vnc access:

… after completing the install, success!

Virtualization, homelabs, eBay rack servers and a 2008 Mac Pro

I’m fascinated with installing different OSes to see what they’re about. At one point on VirtualBox I had about 20 different VMs with all sorts of guests from OS/2 to many different Linux distros. Somewhere on my internet travels I ran into the Reddit Homelab group, a community of sysadmins who run virtualization on older, used rack servers (and other hardware), to experiment with configuration of VMWare ESXi, and other virtualization software like Proxmox VE.

Window shopping on eBay, you can pick up various used Dell or HP rack servers with dual Xeons and several swappable harddrive bays for around $100 to $200 depending on the specs. I was getting close to picking up one of these, until I wondered if you can run ESXi on a Mac Pro. Turns out you can and it is even supported hardware on VMWare’s HCL list. Trouble is my eBay 2008 Mac Pro is not on the supported list for current ESXi versions, so I’m not sure if a current version would install and work ok, or whether I’d have to go back a few versions.

My MacPro currently has 20GB RAM, and I’ve got 3 empty drive bays. Watching a few YouTube videos such as the ones below, I feel a weekend project coming on 🙂


Amateur Radio CQ WW RTTY contest 9/22-9/23/17: 40m contacts using an end fed wire antenna at 5ft

I worked a few hours in the CQ WW RTTY contest today and logged 30 contacts so far, mostly on 20m, a few on 15m, and then this evening several on 40m.

For 20m and 15m I have homebrew wire dipoles in my attic at about 33ft above ground. They probably don’t work as well as they would at the same height outside in the clear, but I logged contacts (from Davis, CA – grid CM98dn) with Japan, Mexico, Chile, Uruguay, Hawaii, British Columbia, and across the US. I’ve worked my Worked All States (WAS) with these antennas, they’ve been working well for me so far.

I haven’t worked out a 40m dipole that will fit in my attic (without some serious bending back and forth), so for 40m and 80m I have a Maple Leaf 160-6m 60ft end fed, which runs along my backyard fence line. Now at about 5ft above ground a 40m antenna is far below it’s optimal height above ground (at least for a 40m dipole which should be 66ft above ground), and yet this antenna works. Does it work well? Probably not as well as an equivalent 40m dipole up at 66ft, but using this antenna this evening to work some RTTY contacts on 40m, I made 6 contacts all between 500 to 600 miles out to the East and South, and then one slightly further out, up to BC at about 700 miles.

I think at 5ft above ground this antenna probably qualifies as an NVIS antenna, but working contacts out to 700 miles is ok for what I’d consider a compromise antenna, or at least with a compromised installation. Or am I misunderstanding how these end feds work?

Docker specific lightweight OSes: Installing RancherOS under KVM on Debian

I’ve been playing around with Docker for a while and feel like I’m at the point where I have questions about how I’d scale up and manage my container deployments, so I’m interested to check out some Docker management tools. I’ve had my eye on Rancher for a while and have been curious about their RancherOS, this is minimal installable OS dedicated to running and managing Docker containers. I don’t have a spare machine free to do a bare metal install, so wondered what it would take to install it in KVM, and whether it would be usable.

The machine I’m installing on is an old HP desktop with an Phenom x4 processor, and only 4GB RAM. The host is running Debian.

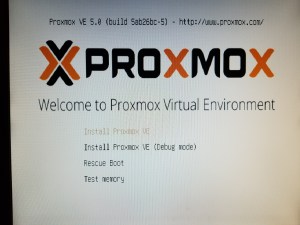
Using KVM, I created a new VM with 1 cpu, 1GB, and booted it from the RacherOS ISO:

After booting from the ISO:

Continuing the instructions in the install guide here, I wondered how I would paste in my public ssh key from my host and dev machines, while running this as a guest in KVM. The instructions require you to create a cloud-config.yml and include your ssh public key. After RancherOS is booted, you can use vi to create the file, but pasting into the guest with no guest extensions installed isn’t possible. You can ssh from the vm out to your host to where your key is located, but going in that direction is not much help. What you really need to do is ssh into the guest vm from a host machine, and then you can easily create the cloud-config.xml and paste in your keys.

Trouble is, the whole point of these initial setup steps with installing with the config file including your keys is to enable ssh access to your RancherOS install, so this is bit of a chicken and egg situation. You can’t ssh in remotely because there’s no default user password for the rancher user, and you can’t ssh in with a key, because you haven’t copied it across to the RancherOS install yet.

Searching around, I’m not the only one installing in a VM and encountered this issue. The trick as suggested here, is to reset the rancher user password on first boot (before starting the install), then at least you know what the initial password is (there isn’t a default password apparently, for security reasons, see here). Look up the ip with ifconfig on first boot, reset the password, then you can ssh in from outside, create the cloud-config.yml file, paste in your key(s), and then install per the instructions with:

sudo ros install -c cloud-config.yml -d /dev/sda

After the install had completed, I was able to ssh from outside with my key that I had already added to the cloud-service.yml, and then following through the next section in the docs, listed the available services, all of which were listed as disabled:

Per the docs here, I attempted to start the rancher service, with:

sudo ros service enable rancher-service

and since everything runs on RancherOS is a docker container, it starts to download the image layers:

And then started it up with:

sudo ros service up rancher-service

At this point as was expecting to find rancher running on port 8080, but it was still not up. The docs seem a bit lacking in this area. Googling ‘how to run rancher on rancheros’ gave a few suggestions, but mainly echoing what I’d already done. Running ‘docker ps’ in the guest VM showed me that the container was up and running, and listening on 8080, so tried again in my browser and it seems it just took a few seconds to get started up. I now have Rancher running on RancherOS in a KVM! Now to start checking it out!